Visiting the Fagradalsfjall volcanic eruption zone in the winter
Ask a local what they recommend you should do when you get to Iceland and they’ll most likely point you in the direction of the Fagradalsfjall eruption zone. After being dormant for eight centuries, this Reykjanes volcanic system unexpectedly spluttered into life in March 2021. The ensuing eruption would last for months, drawing many thousands of hikers to viewing areas overlooking the crater and leading to a boom in scenic overflights and helicopter rides.
But when, after six months of putting on a show, activity ceased in the autumn, that wasn’t it. It turned out the eruption wasn’t over, it was just on pause. The following summer, for a few glorious weeks, the volcano started to spew lava again. In summer 2023, a third, albeit brief,spurt of activity drew yet more excited visitors.
At the time of writing, the volcano is dormant once again, but even without active lava flows, the much-changed landscape is still a highlight of a visit to the Reykjanes peninsula. But if you’re planning a winter trip to Iceland, is is possible – and safe – to come to the Fagradalsfjall eruption zone? Here’s what you need to know.
Which hiking trail should you follow?
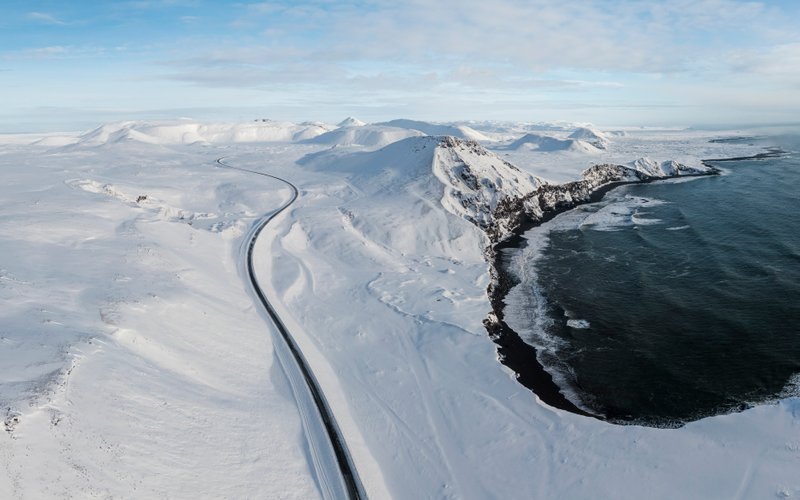
Hiking to this volcano has never been an easy stroll. Now, following three eruptions, the Fagradalsfjall eruption zone covers a large area. As a consequence, there are are multiple hiking trails. None of them are especially short, so whichever you choose you’re going to need to be prepared for a significant walk before you reach the altered landscape.
Important!
Never, ever, walk on cooling lava. Even though the eruption is over, the crust of this blackened lava is thin and there could still be molten rock underneath. Its temperature is 1200°C. Fall in, and you won’t live to tell the tale.
• Path E - Meradalir
The 2023 eruption site was centred on Litli-Hrútur. In terms of distance, this is the most challenging path, as you’re looking at an 18-20 km round trip. Seasoned hikers might complete this trail in five or six hours, but if you’re not used to covering long distances on foot, it could take significantly longer. Much of the route is on gravel, with the final stretch over moss-covered rocks which can get slippery.
• Path A - Mt. Fagradalsfjall
This path follows the western edge of the eruption landscapes. It is somewhere in the region of 12-16 km round trip. For many people, that’s at least two to two and a half hours’ walk each way. (If you’re wondering why the distance varies, that’s because it depends on where you park before you set out.) This is still a challenging trail so don’t automatically think that because it’s a little shorter it will be easier.
• Path C - Mt. Langihryggur, and the trail to Nátthagi
A shorter option is Path C, a route which takes you to a viewing point where you can see cooled lava from the earliest part of the eruption. You’re looking at a distance of about 8 km return, which is considerably less than the previous two trails. Another trail, to Nátthagi, is just 4 km round trip and gets you to the edge of the lava field. However, with these options you won’t get to see a crater, so consider what you’re hoping to see and choose accordingly.
Things to bear in mind if you plan to hike in winter
• The amount of daylight
Why is it important to know how long the various hikes are? Well, if you’re coming in winter, you need to take a look at how much daylight you have to play with. Sunrise and sunset times vary considerably. In December, you could have as little as four hours of light, while by late February you could be looking at more than double that figure.
Make a realistic assessment of your fitness and be sure to set out on a trail only if you are confident that it’s within your abilities to complete it. Even without the hazards associated with flowing lava and the volcanic gases that come with an active eruption, this is not the kind of place you want to risk your own safety or that of other people.
• The weather
This is going to be crucial for hikers. In winter you have a higher chance of bad weather. It might rain, hail, sleet or snow. Another hazard comes from the wind, which can be strong enough to knock you off your feet. Hiking trails are sometimes closed because of inclement weather, so heed the rules if this happens during your visit.
• How to get there and where to park
If you’re self-driving rather than coming as part of a guided tour, then you’ll be pleased to learn that the site is easy to find. Coming from Keflavík, you can take route 41 and then turn onto route 43, picking up route 427 as you head east out of Grindavík. Alternatively, from route 1 turn right onto route 44 in the direction of Hafnir and then take route 425 to Grindavík before picking up the 427. You can check road conditions here.
Parking alongside route 427 is not permitted so you’ll need to find a space in one of the car parks. There is more than one and they each have different parking arrangements. Regardless, you’ll need to pay a fee no matter which one you end up in. Parking P1 (Bílastæði) is a popular option, accessed off Route 427. Meanwhile, Parking P2 (Stóri-Leirdalur) is located a little further to the east but also along the 427.
• What to wear
Kitting yourself out with the proper gear is vital at any time, but especially in winter when the weather is likely to present more of a challenge. Firstly you’ll need to dress warmly, making sure that you add base layers that wick up moisture. Hat, gloves and a scarf will help keep your extremities from getting cold. A good quality waterproof and windproof outer layer is vital.
You need to think carefully about your footwear too. First, pull on some decent socks; many hikers opt for a wool blend for comfort and durability. Hiking boots with a thick tread and ankle support are another crucial element of your preparations. Make sure they fit well and are properly worn in before you set out. Even so, it’s wise to pack some blister plasters just in case.
• Preparations and what to bring
Likewise, there are certain items that you’ll need to carry with you. A flashlight or head torch will be invaluable if the light fades, either because it’s getting late or a change in the weather is having an impact. Carry a day pack, in which you can bring a basic first aid kit and some energy-giving snacks as well as enough water to last you for the duration of the hike.
No matter which trail you follow, the ground is uneven, rarely firm and often slippery. You may find it’s helpful to bring hiking poles as these can help you steady yourself and make it easier on any ascents and descents. Finally, pop a charged up phone or camera in your pocket so that you can record what this magnificent landscape looks like.
One final piece of advice as you prepare to be wowed by the Fagradalsfjall eruption zone is to file a safety plan before you set out so that others know your travel plans. This can easily be done online.